Step 1
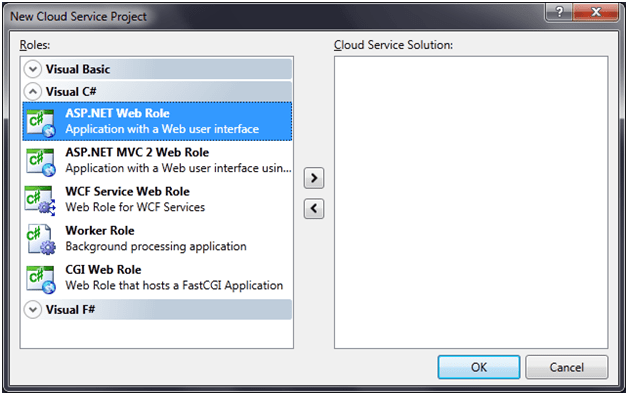
Open Visual Studio 2010 as an administrator. Select File -> New -> Cloud Service. Click on Windows Azure cloud service template. Give name of the cloud service. After creating the cloud service select the type of role. There are many roles to choose from. For our purpose, we will choose ASP.Net Web Role.
Now examine the solution explorer. There should be 2 projects. Called WebRole1 and CloudServices1. These names may different basis of the name you given at time of creation of cloud service project in step1.
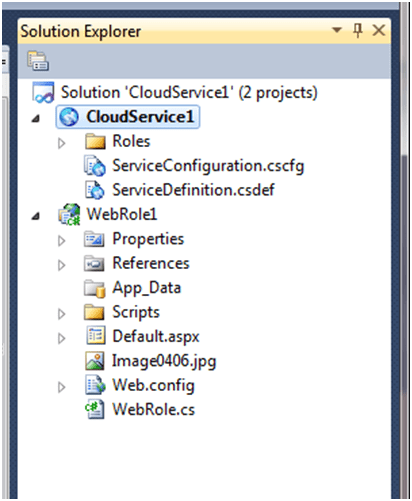
CloudService1 project is having two service configuration file.
ServiceDefinition.csdef
This is definition file for the cloud service. This file contains setting like connection string, Endpoints etc.
ServiceConfiguration.csfg
This is configuration file for the cloud service. This contains setting for the roles. This file contains information for number of instance for the service. If we want to increase number of instance for the role only this configuration need to be amend to accommodate the change.
WebRole1 project
This is a simple ASP.Net project. Where we could do whatever we want and could do on an ASP.Net project.
Step 2
Creating the web project
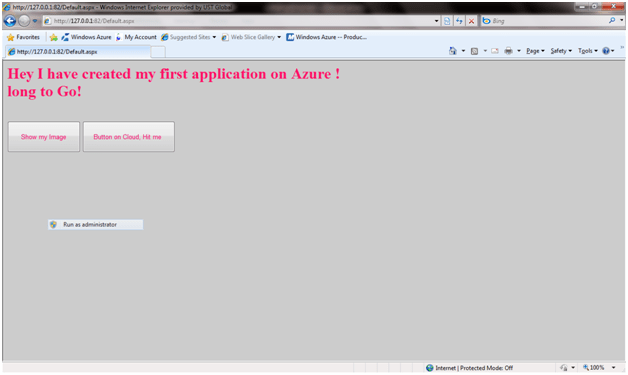
For all our demo purpose, I have modified the aspx page with two buttons and one label and one image control.
Div section of Default.aspx
| <div>
<asp:Image ID=”Image1″ runat=”server” ImageUrl=”~/Image0406.jpg”Width=”200px” Height=”300px” /> |
Default.aspx.cs
| namespace WebRole1{
public partial class _Default : System.Web.UI.Page lblImageMsg.Visible = false; |
Step 3
Running on Local Development Fabric
Run the application. This will run on the local development fabric. When we install azure SDK, local development fabric got installed. And when we run the cloud service local development fabric get started and host the application. This provides exactly the same environment as of azure in the cloud. This local development fabric could be used to debug the application before hosting into the cloud.
Running the application on local development fabric
On clicking at task tray; Local Development Fabric icon would be there. Right click on the icon will give below options as of below diagram.

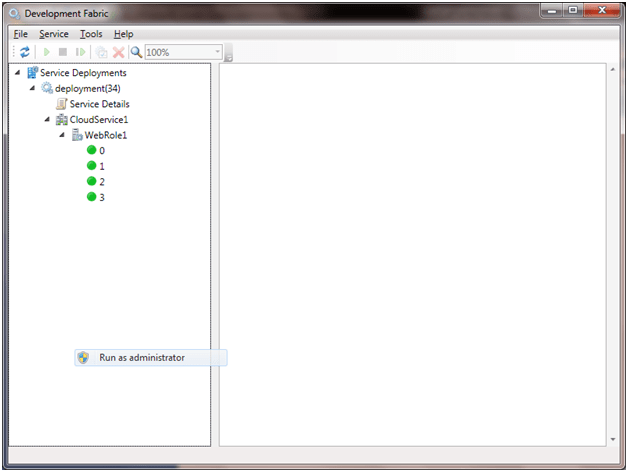
Click on, Show Development Fabric UI. It will open the UI. This UI will show state of all the instances running for the different types of roles.
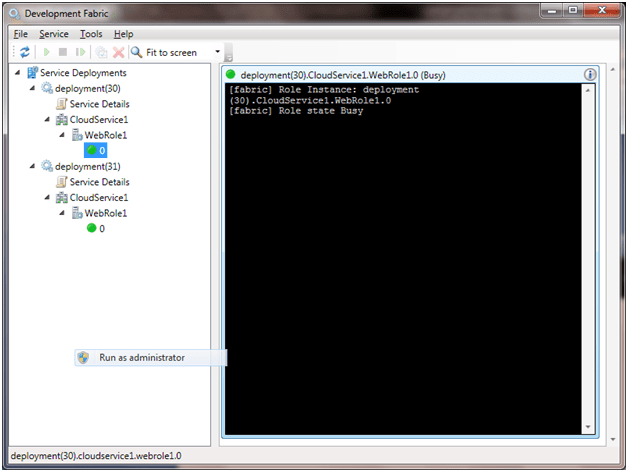
Since now only one instance of our application is running, so there is one instance showing in the UI. Let us go back to ServiceConfiguration.csfg
and open this file. Increase number of instance from 1 to 4.
ServiceConfiguration.csfg
| <?xml version=“1.0“?> <ServiceConfiguration <Role
<ConfigurationSettings> <Setting </ConfigurationSettings> </Role> </ServiceConfiguration> |
Now again open the Development Fabric UI from the tray icon. We can see on clicking of WebRole1, there are 4 instances are running. We could individually manage all the instances of the Web Role.
Step 4
Publishing to cloud (azure)
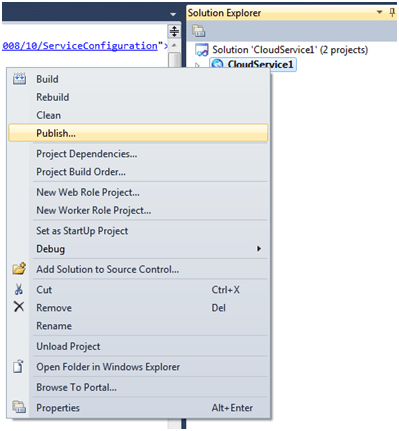
Right Click on Cloud Service 1 project and select Publish.
It will open the azure site and ask for the login.
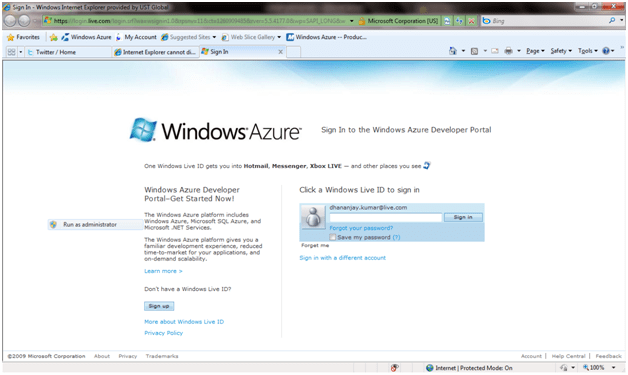
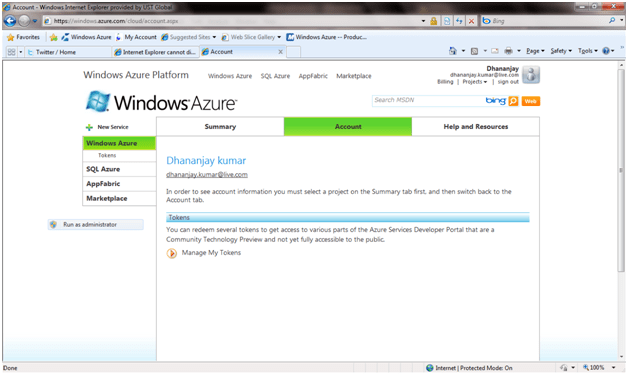
If first time, you are login to azure site for publishing browse to account section to redeem your token.
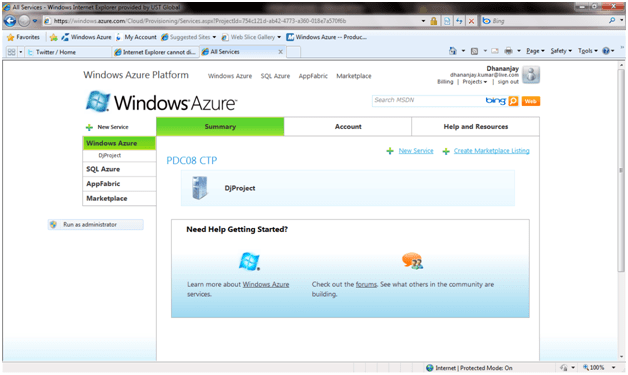
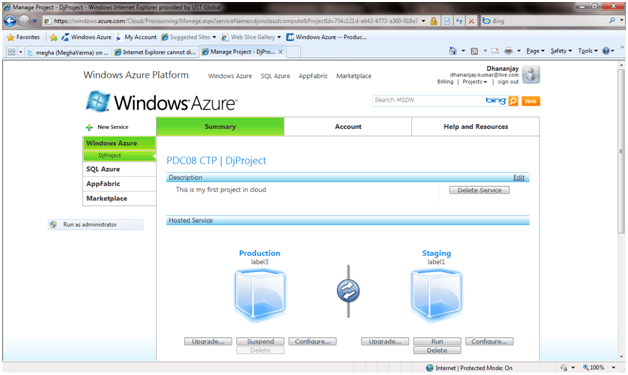
Now either create a project for windows azure or select existing project. I have already a project created with the name of DJProject . I am selecting that.
Since, I have already hosted in the project before. So I am getting the upgrade option. First time, you won’t get upgrade option. First time on creation of Windows azure project it will ask you to give an URL for your project . Just give an URL, which you will use to access your application across.
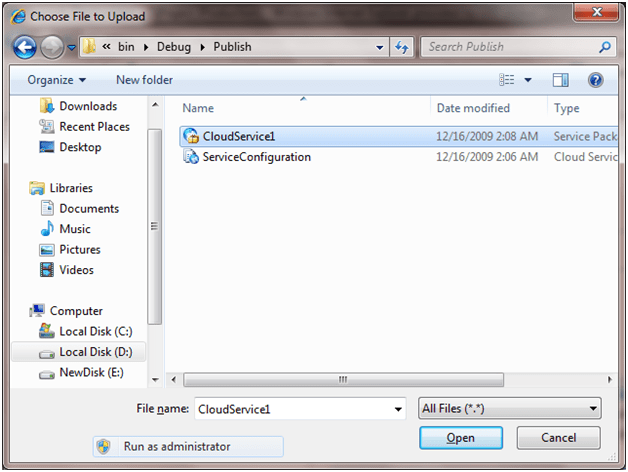
Click on upgrade option . It will ask for the package file and config file. Browse to CloudService1\bin\publish folder. CloudService1 is name of the application. It may be different in your case , depending on what name you have given in step1.
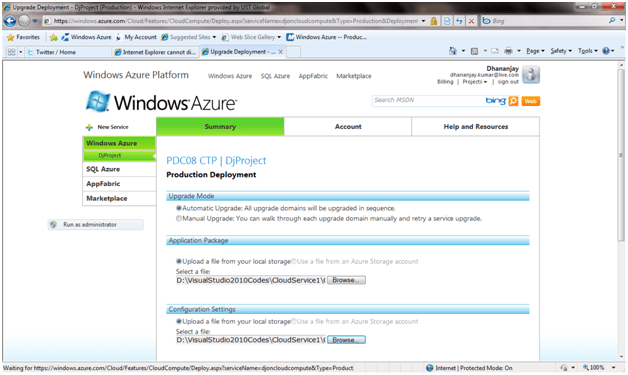
After uploading package and configuration file , give a label name and click on deploy.
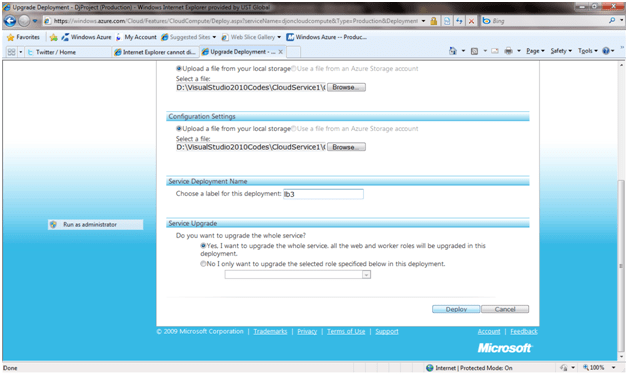
It will take some time for deployment. After successfully deployment you will see a green sign against Web Role saying it is in ready state. You could directly click on Web site URL to test your application on cloud.
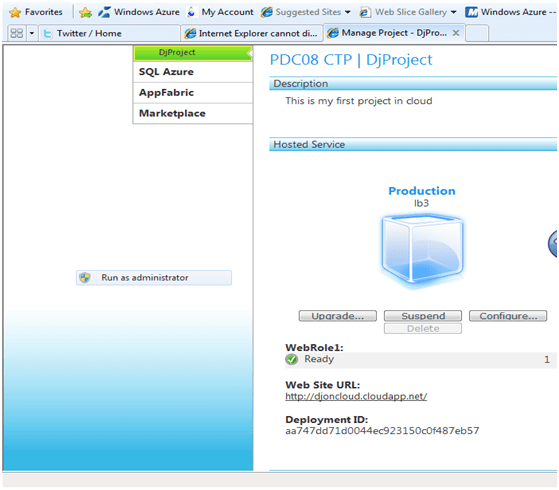
Now when you open the URL , you will get the same page as output you got on the local development fabric. And now you successfully hotsed in cloud.
Discover more from Dhananjay Kumar
Subscribe to get the latest posts sent to your email.

Thanks Dhananjay for this article.
I was thinking that Azure is tough to Learn, But you made it so easy. Thank you so much for step by step demostration.
God Bless You!
Hey..Dhananjay…great article for beginners…Thanks..
Sir your article made azure simpified a lot. I really got better insights on could app development. Great work.