In this post we will do walkthrough of installing Windows Azure SDK on Visual Studio 2012. If Windows Azure SDK is not installed on your machine then on launching of Visual Studio 2012 and selecting Cloud project template, you will get option of Get Windows Azure SDK for .NET. Click on that.
You will get an option to Download Windows Azure SDK for .NET

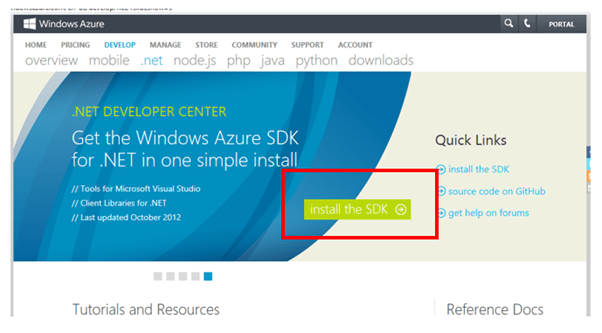
Next you will be navigated to Windows Azure download page , Click on install the SDK
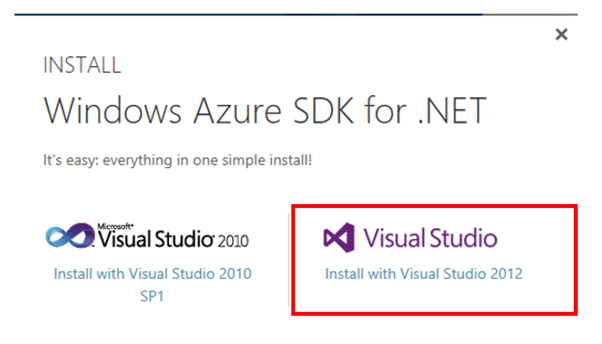
Choose Visual Studio 2012 to start installation
You will be prompted with confirmation box. Choose to run in the confirmation box

You need to now click on Install button to start installing.
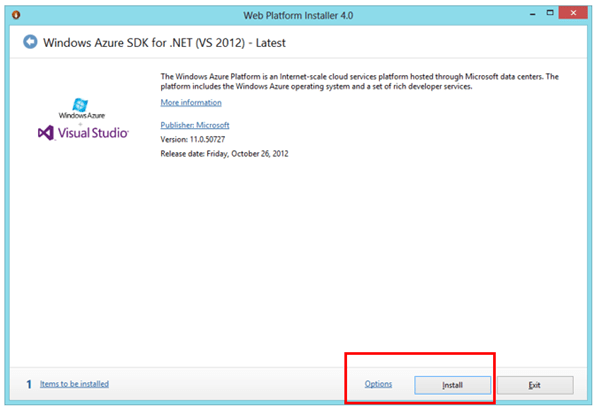
Make sure all the prerequisite is installed and Accept Term and conditions.

Windows Azure SDK will get start installing. After successful installation on launching of Visual Studio 2012 and selecting Cloud project tab, you will get Windows Azure Cloud Service project template to start working with Windows Azure projects.

In this way you can install Windows Azure SDK on Visual Studio 2012. I hope you find this post useful. Thanks for reading it.
Discover more from Dhananjay Kumar
Subscribe to get the latest posts sent to your email.

Nice to see this blog post!
Thank you so much sir !! 🙂
Is this for real? Going to a website and clicking install is now an article?
HI Bart ,
I am sorry for your sadness on my last article ! I understand that is very basic article . However I got a request from a begineer that they r facing issue in installing AZURE SDK so wrote this to help them !
Thanks
/DJ