Objective
This article will give step to step illustration of creating a simple Image Viewer for Windows 7 mobile.
Step 1
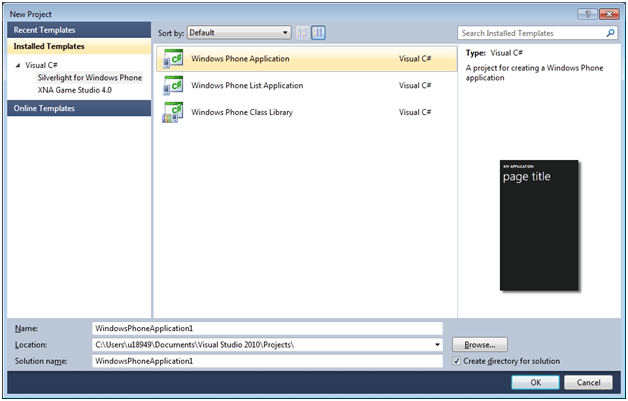
Create a new Windows Phone Application. From Silverlight for Windows Phone tab select Windows Phone Application project type.
Step 2
In this step I will create an entity class for images to be displayed. This class will contain two properties. Filename property for the name of the image and image property for the image source. To create just right click on the project and add a class.
Photo.cs
1 namespace PhotoApplication
2 {
3 public class Photo
4 {
5 public string FileName { get; set; }
6 public ImageSource Image { get; set; }
7
8 }
9 }
Step 3
Design the page as below. Add below controls in content grid.
- Add a list box. Set the height as 520 and width as 450.
- Add Item Template for List box.
- Add Data template inside item template
- Inside Data template add a stack panel with horizontal orientation.
- Inside Stack panel put an Image control and bind source of this control to image property of Photo class.
-
Inside Stack panel put a text block and bind text property of this control to Filename property of Photo class.
MainPage.Xaml
| <phoneNavigation:PhoneApplicationPage x:Class=”PhotoApplication.MainPage” xmlns=http://schemas.microsoft.com/winfx/2006/xaml/presentation xmlns:x=http://schemas.microsoft.com/winfx/2006/xaml xmlns:phoneNavigation=”clr-namespace:Microsoft.Phone.Controls;assembly=Microsoft.Phone.Controls.Navigation” xmlns:d=http://schemas.microsoft.com/expression/blend/2008 xmlns:mc=http://schemas.openxmlformats.org/markup-compatibility/2006 mc:Ignorable=”d” d:DesignWidth=”480″ d:DesignHeight=”800″ FontFamily=”{StaticResource PhoneFontFamilyNormal}” FontSize=”{StaticResource PhoneFontSizeNormal}” Foreground=”{StaticResource PhoneForegroundBrush}”> <Grid x:Name=”LayoutRoot” Background=”{StaticResource PhoneBackgroundBrush}”> <Grid.RowDefinitions> <RowDefinition Height=”Auto”/> <RowDefinition Height=”*”/> </Grid.RowDefinitions> <Grid x:Name=”TitleGrid” Grid.Row=”0″> <TextBlock Text=”Windows 7 phone” x:Name=”textBlockPageTitle” Style=”{StaticResource PhoneTextPageTitle1Style}”/> <TextBlock Text=”Media” x:Name=”textBlockListTitle” Style=”{StaticResource PhoneTextPageTitle2Style}”/> </Grid> <Grid x:Name=”ContentGrid” Grid.Row=”1″> <ListBox x:Name=”lstImage” Width=”450″ Height=”520″> <ListBox.ItemTemplate> <DataTemplate> <StackPanel Orientation=”Horizontal”> <Image Source=”{Binding Image}” Width=”150″ Stretch=”Uniform” HorizontalAlignment=”Center” /> <TextBlock Text=”{Binding FileName}” TextWrapping=”Wrap” /> </StackPanel> </DataTemplate> </ListBox.ItemTemplate> </ListBox> </Grid> </Grid></phoneNavigation:PhoneApplicationPage> |
Step 4
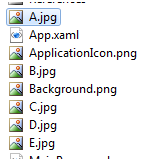
Right click on project and add few images in project. I am adding 5 jpeg images. To add images right click on project and click add existing item then select images from local computer. See below the images added in project
Step 5
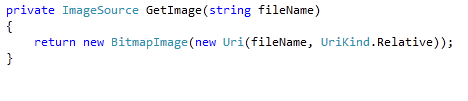
Right a function to convert filename into Bitmap image. The below function GetImage() will take filename as input and return an image source.
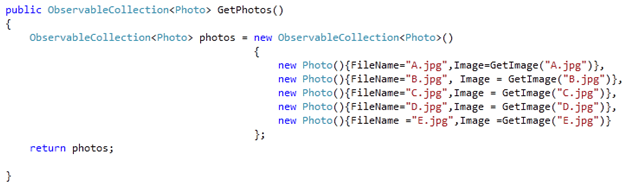
Right a function to initialize the collection of images. Function GetPhotos() will return an observableCollection of Photo class . This collection can directly be bind to the itemsource of list box control.
On the Main Page load bind the itmesource to collection.
MainPage.Xaml.cs
1 using System;
2 using System.Collections.Generic;
3 using System.Linq;
4 using System.Net;
5 using System.Windows;
6 using System.Windows.Controls;
7 using System.Windows.Documents;
8 using System.Windows.Input;
9 using System.Windows.Media;
10 using System.Windows.Media.Animation;
11 using System.Windows.Shapes;
12 using Microsoft.Phone.Controls;
13 using System.Collections.ObjectModel;
14 using System.Windows.Media.Imaging;
15
16 namespace PhotoApplication
17 {
18 public partial class MainPage : PhoneApplicationPage
19 {
20 public MainPage()
21 {
22 InitializeComponent();
23
24 SupportedOrientations = SupportedPageOrientation.Portrait | SupportedPageOrientation.Landscape;
25
26 lstImage.ItemsSource = GetPhotos();
27
28 }
29
30
31 public ObservableCollection<Photo> GetPhotos()
32 {
33 ObservableCollection<Photo> photos = new ObservableCollection<Photo>()
34 {
35 new Photo(){FileName=“A.jpg”,Image=GetImage(“A.jpg”)},
36 new Photo(){FileName=“B.jpg”, Image = GetImage(“B.jpg”)},
37 new Photo(){FileName=“C.jpg”,Image = GetImage(“C.jpg”)},
38 new Photo(){FileName=“D.jpg”,Image = GetImage(“D.jpg”)},
39 new Photo(){FileName =“E.jpg”,Image =GetImage(“E.jpg”)}
40 };
41 return photos;
42
43 }
44
45 private ImageSource GetImage(string fileName)
46 {
47 return new BitmapImage(new Uri(fileName, UriKind.Relative));
48 }
49
50
51 }
52 }
53
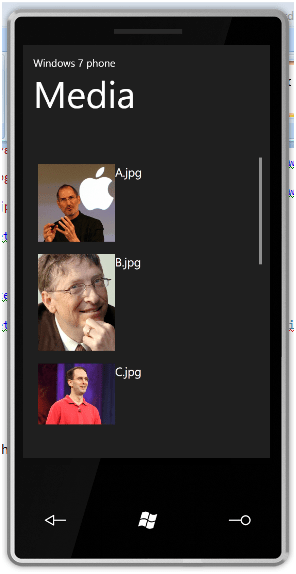
Press F5 to get the output
Thanks for reading. I hope it was useful. Happy Coding.
Discover more from Dhananjay Kumar
Subscribe to get the latest posts sent to your email.

I found it very helpful and useful, could you help me with something i am trying to create, maybe give me an example or the do the first part so i can continue myself
I want to create a App which allows the user to select from a category of road signs and then display a image of the road sign showing its meaning.
First page: shows different selections as a button/hyper-link for example: Information Signs, Road Marking Sign, Public Signs or Parking Signs
Second Page: After the user selects a category for example Road Marking Signs, they can now see a number of different road marking images, which they can scroll through and select one.
Third page: After selecting the images the third page will show the image of the sign followed by a description of the sign.
The above text shows a short description of the type of App i am trying to create if you can show me how i can do this it would be very helpful for me, please reply back. You can also contact me through my email if you like.
Thanks
Rahul