Objective
This tutorial will explain
Introduction of Run Time Binding in SilverLIght
Example to achieve run time binding.
Explanation
We are having an IPL class. A list objlist is there which is containing numbers of IPL objects. Our example will fetch data from that list and display in silver light control on click event of button. For this purpose, we are using RUN TIME BINDING.
Run Time Binding in SilverLight application
Binding a Silver Light application entirely through .Net code is Run Time Binding.It is very useful when Source and Property are not known at the design time.Binding could be created using System.Windows.Data namespace and using instance of Binding class.It allows changing binding at run time.Run Time Decision of setting the Property. So in below situation we need to use Run Time Binding.
Binding class
This class could be created using XAML markup extension also.It is inside namespace System.Window.Data.It contains all the property which was supported in XAML markup code. Properties are shown in below figure.
Source -> It points to the source object
Path -> It points to the source object property
Constructor of Binding class is overloaded with two parameters. We could pass either Zero argument or a string Path value. Both are shown in below figures
SetBinding method
It is use to link the binding instance with their corresponding Targets.It is method of FrameWorkElement base class.
It takes two parameters as input.Dependency Property and Binding Instance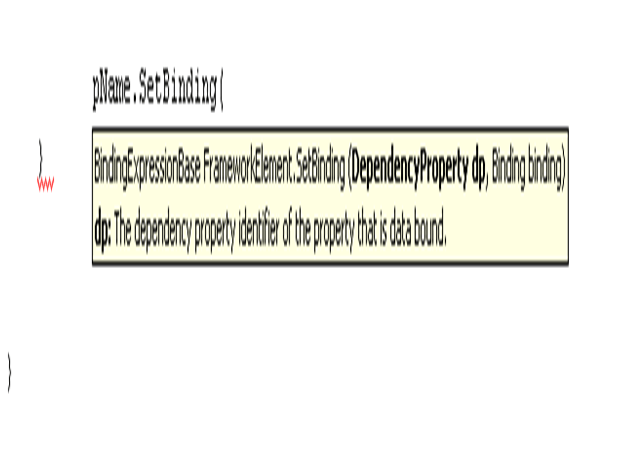
The way to find out, which object supports binding. Just we need to check that object having SetBinding method or not.
Steps to create Run Time Binding
Step 1
Create new instance of Binding object for each target and source pair. Code for that is given below.
Step 2
Set the source property. Source property will get set to the instance of the business class.( In our case it is IPL.)
IPL _obj;.
_obj= new IPL();
pNameBinding.Source = _obj;
tNameBinding.Source = _obj;
cNameBinding.Source = _obj;iscaptionBinding.Source = _obj
Step 3
Now to Link Binding instance with their corresponding target.
pName.SetBinding(TextBox.TextProperty, pNameBinding);
tName.SetBinding(TextBox.TextProperty, tNameBinding);cName.SetBinding(TextBox.TextProperty, cNameBinding);
isCaption.SetBinding(CheckBox.IsCheckedProperty, iscaptionBinding);
Example and code to achieve above said output
Step 1
Create a Silver Light application.Replace Page.Xaml.Cs file with below code.
Page.Xaml.cs
| <UserControl x:Class=”SilverlightBindingTesting.MainPage” xmlns=http://schemas.microsoft.com/winfx/2006/xaml/presentation xmlns:x=http://schemas.microsoft.com/winfx/2006/xaml Width=”400″ Height=”300″> <Grid x:Name=”LayoutRoot” Background=”White”> <Grid.RowDefinitions> <RowDefinition /> </Grid.RowDefinitions> <Grid.ColumnDefinitions><ColumnDefinition /> </Grid.ColumnDefinitions> <Rectangle Fill=”#FFDEE6FB” Grid.Column=”0″ Grid.Row=”0″ RadiusX=”20″ RadiusY=”20″ Opacity=”0.8″ StrokeThickness=”0″ /> <Grid Grid.Column=”0″ Grid.Row=”0″ Margin=”10,10,10,10″> <Grid.ColumnDefinitions> <ColumnDefinition Width=”80″ /> <ColumnDefinition Width=”260″ /> </Grid.ColumnDefinitions> <Grid.RowDefinitions> <RowDefinition Height=”*” /> <RowDefinition Height=”*” /> <RowDefinition Height=”*” /> <RowDefinition Height=”*” /> <RowDefinition Height=”*” /> </Grid.RowDefinitions> <TextBlock Text=”NAME” Margin=”10,5,10,5″ Grid.Row=”0″ Grid.Column=”0″ FontSize=”15″ Foreground=”BlueViolet” /> <TextBlock Text=”TEAM” Margin=”10,5,10,5″ Grid.Row=”1″ Grid.Column=”0″ FontSize=”15″ Foreground=”BlueViolet” /> <TextBlock Text=”COUNTRY” Margin=”10,5,10,5″ Grid.Row=”2″ Grid.Column=”0″ FontSize=”12″ Foreground=”BlueViolet” /> <TextBlock Text=”CAPTION” Margin=”10,5,10,5″ Grid.Row=”3″ Grid.Column=”0″ FontSize=”12″ Foreground=”BlueViolet” /> <TextBox x:Name=”pName” Margin=”10,5,10,5″ Grid.Row=”0″ Grid.Column=”1″ FontSize=”9″ Foreground=”Black” /> <TextBox x:Name=”tName” Margin=”10,5,10,5″ Grid.Row=”1″ Grid.Column=”1″ FontSize=”9″ Foreground=”Black” /> <TextBox x:Name=”cName” Margin=”10,5,10,5″ Grid.Row=”2″ Grid.Column=”1″ FontSize=”9″ Foreground=”Black” /> <CheckBox x:Name=”isCaption” Margin=”10,5,10,5″ Grid.Row=”3″ Grid.Column=”1″ /> <Button x:Name=”bindData” Margin=”10,5,10,5″ Grid.Row=”4″ Grid.Column=”1″ Content=”PLAYERS” FontSize=”10″ Foreground=”Red” Click=”bindData_Click” /> </Grid></Grid></UserControl> |
Step 2
Right click on project and add a new class. Name this class as IPL
IPL.cs
| namespace SilverlightBindingTesting{public class IPL{ public string Player_Name { get; set; } public string Team_Name { get; set; } public string Country_Name { get; set; } public bool IsCaption { get; set; }}} |
Step 3
Open Page.Xaml.Cs file and replace with below code. This code is containing simple logic to bind data.
Page.Xaml.cs
| using System;using System.Collections.Generic;using System.Linq;
using System.Net; using System.Windows;using System.Windows.Controls; using System.Windows.Documents; using System.Windows.Input; using System.Windows.Media; using System.Windows.Media.Animation; using System.Windows.Shapes; using System.Windows.Data; namespace SilverlightBindingTesting{ public partial class MainPage : UserControl{ InitializeComponent(); _obj.Country_Name=“India”; _obj.IsCaption=true; _obj.Player_Name=“Sachin Tendulakr”;_obj.Team_Name=“Mumbai Indian “; objlist.Add(_obj); _obj = new IPL(); _obj.Country_Name = “England”; _obj.IsCaption = true; _obj.Player_Name = “Kelivin Piterson”; _obj.Team_Name = “Royal Challenger Bangalore”; objlist.Add(_obj); _obj = new IPL(); _obj.Country_Name = “India”; _obj.IsCaption = false; _obj.Player_Name = “Herchle Gibbs”; _obj.Team_Name = “Deccan Charger Hyderabad”; objlist.Add(_obj);} pNameBinding.Source = objlist[i]; tNameBinding.Source = objlist[i];cNameBinding.Source = objlist[i]; iscaptionBinding.Source = objlist[i]; pName.SetBinding(TextBox.TextProperty, pNameBinding); tName.SetBinding(TextBox.TextProperty, tNameBinding); cName.SetBinding(TextBox.TextProperty, cNameBinding); isCaption.SetBinding(CheckBox.IsCheckedProperty, iscaptionBinding);} }} |
Step 4
Press F5 and run the application. You will get output
Happy Coding .
Discover more from Dhananjay Kumar
Subscribe to get the latest posts sent to your email.
