Objective
Now it is time to get rid of default layouts of SilverLight. In this article, we will learn how to create a very basic custom layout and how to use that in SilverLight application.
Step 1
Create a new Silver Light application.
Step 2
Add a class in SilverLight application. Give any name for this class. My name is here MyPanel.
Step 3
Extend Panel class in MyPanel class.
namespace MargiesTravel.Controls{
public class MyPanel :Panel
{}}
Step 4
Now task is to find desired size of each child. To find desire size of each children, our custom panel will have to call Measure() function on each child.
Measure() function could be called by overriding MeasureOverride function of Panel class. This could be done as
protected override Size MeasureOverride(Size availableSize){
foreach (UIElement child in Children)
{
child.Measure(availableSize);
}
return base.MeasureOverride(availableSize);
}
aviliableSize is the variable which shows size available to the custom Panel. If child desired size is 300 pixels and aviliableSize is 200 pixels then, child size will be clipped.
Step 5
After reading the desire size of each child, now time to arrange them in custom panel. For this purpose MyPanel class will override ArrangeOverride method of Panel class.
protected override Size ArrangeOverride(Size finalSize){}
Now, we will implement ArrangeOverride method to place the child into MyPanel.
protected override Size ArrangeOverride(Size finalSize){
//return base.ArrangeOverride(finalSize);
double currentLeft = 0;
double currentTop = 0;
double currentRowHeight = 0;
foreach (UIElement child in Children){
if ((currentLeft + child.DesiredSize.Width) > finalSize.Width)
{
currentLeft = 0;
currentTop += currentRowHeight;
currentRowHeight = 0;
}
child.Arrange(new Rect(currentLeft, currentTop, child.DesiredSize.Width, child.DesiredSize.Height));
currentLeft += child.DesiredSize.Width;
currentRowHeight = Math.Max(currentRowHeight, child.DesiredSize.Height);
}
return finalSize;
}
So, the entire MyPanel class will look like
MyPanel.cs
using System;
using System.Net;
using System.Windows;using System.Windows.Controls;
using System.Windows.Documents;
using System.Windows.Ink;
using System.Windows.Input;
using System.Windows.Media;
using System.Windows.Media.Animation;
using System.Windows.Shapes;
namespace MargiesTravel.Controls{
publicclass MyPanel :Panel{
protected override Size MeasureOverride(Size availableSize){
foreach (UIElement child in Children)
{
child.Measure(availableSize);
}
return base.MeasureOverride(availableSize);
}
protected override Size ArrangeOverride(Size finalSize)
{
double currentLeft = 0;
double currentTop = 0;
double currentRowHeight = 0;
foreach (UIElement child in Children){
if ((currentLeft + child.DesiredSize.Width) > finalSize.Width){
currentLeft = 0;
currentTop += currentRowHeight;
currentRowHeight = 0;}
child.Arrange(new Rect(currentLeft, currentTop, child.DesiredSize.Width, child.DesiredSize.Height));
currentLeft += child.DesiredSize.Width;
currentRowHeight = Math.Max(currentRowHeight, child.DesiredSize.Height);}
return finalSize;}}}
Up to this step, custom panel called MyPanel has been created.
Step 6
Go to MainPage.xaml of your SilverLight application.
- Inherit the namespace of the class MyPanel. In my case namespace name is MargiesTravel.Controls
xmlns:cl=”clr-namespace:MargiesTravel.Controls”
- Put our custom panel inside the default Grid panel.
<Grid x:Name=”LayoutRoot” Background=””>
<cl:MyPanel>
</cl:MyPanel>
- Put some control inside the custom panel. After putting controls Xaml code will look like.
MainPage.xaml
<UserControl x:Class=”MargiesTravel.Controls.MainPage”
xmlns=http://schemas.microsoft.com/winfx/2006/xaml/presentation
xmlns:x=http://schemas.microsoft.com/winfx/2006/xaml
xmlns:cl=”clr-namespace:MargiesTravel.Controls”
Width=”800″ Height=”800″>
<Grid x:Name=”LayoutRoot” Background=”Blue”>
<cl:MyPanel>
<Button Content=”Child 1 for Custom panel “ Height=”200″ Width=”50″/>
<TextBlock
Text=”Child 2 for Custom Panel “ Width=”150″ Height=” 30″ />
<TextBlock
Text=”Child 3 for Custom Panel “ Width=”200″ Height=”130″ />
<Button Content=”Child 4 for Custom panel “ Height=”300″ Width=”100″/>
<TextBlock Text=”Child 5 for Custom Panel “ Width=”200″ Height=”50″ />
<Slider Width=”300″ Value=”10″ Height=”50″ />
<TextBox Text=” Child 6 for Custom Panel” Width=”200″ Height=”30″ />
<TextBlock Text=” Child 7 for Custom Panel”/>
<CheckBox Content=”Child 8 for Custom Panel” Width=”140″ />
<Slider Width=”300″ Value=”10″ Height=”50″ />
</cl:MyPanel>
</Grid></UserControl>
Run the SilverLight Application.
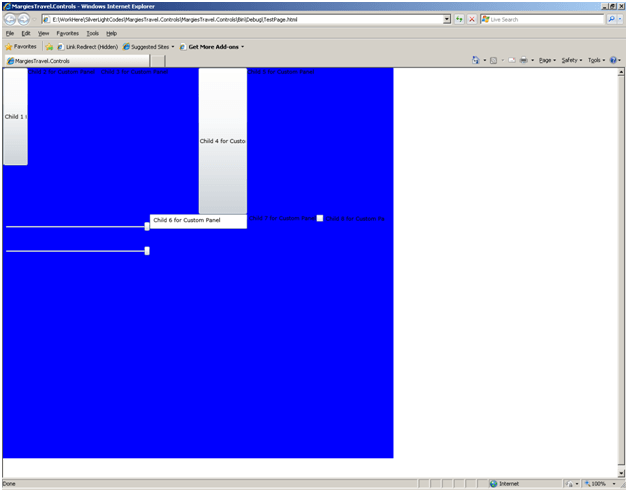
Conclusion
This article explained how to create a custom layout for SilverLight 2 application.
Happy Coding
Discover more from Dhananjay Kumar
Subscribe to get the latest posts sent to your email.
