Objective
Core purpose of this article is to explain, how to attach and debug a sequential workflow using Visual studio 2008(using object model) to a document library of a SharePoint site.
In this article, I will discuss
- How to create a Sharepoint Site
- How to create Document Library inside that
- How to add custom properties in Document library
Last but not least,
- I will discuss, how to add Sequential Workflow to document library using Visual studio 2008.
Step1: Create SharePoint site
Follow the steps given below, to create a SharePoint site.
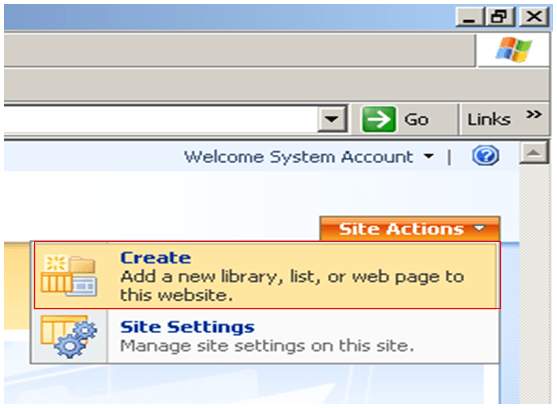
Step 1a:
From site action select Create option
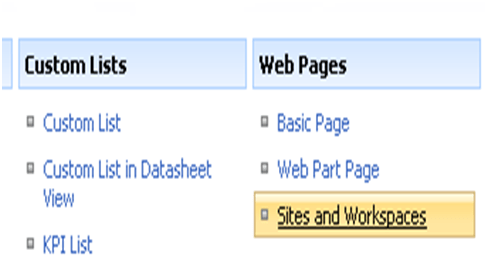
Step 1b:
From Web Pages tab select Sites and Work Spaces
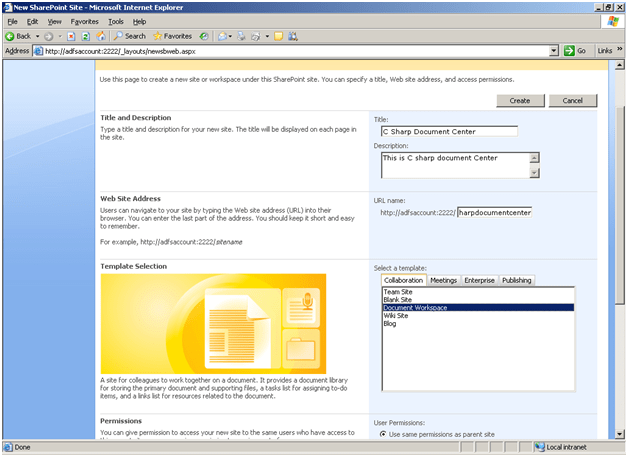
Step1c:
Give name and title of the site. And leave other setting as default. The name I am giving in C Sharp Document Center and URL is
http://adfsaccount:2222/csharpdocumentcenter/default.aspx.
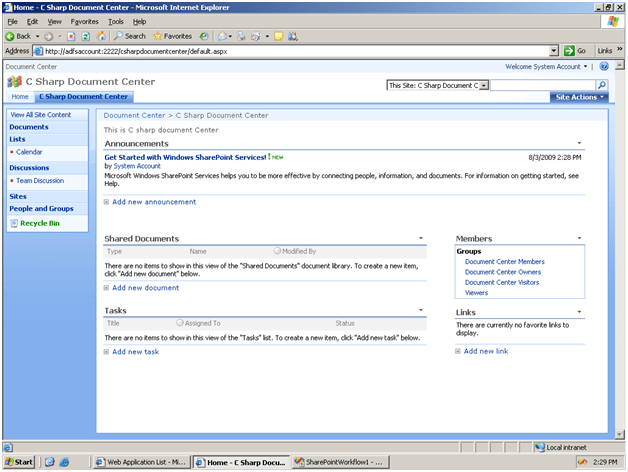
So the site will look like below,
Step 2: Create Document Library
Step 2a:
Click on Documents from left Panel.
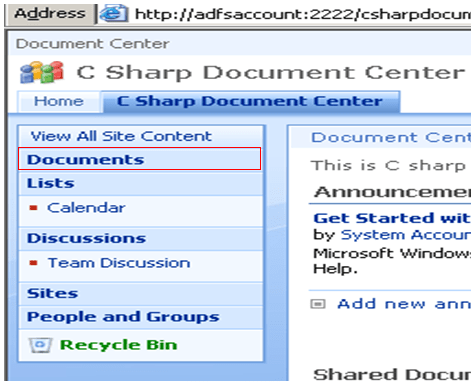
Step 2b:
Then click on Create
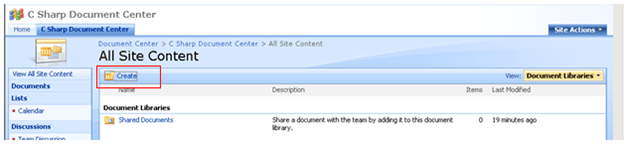
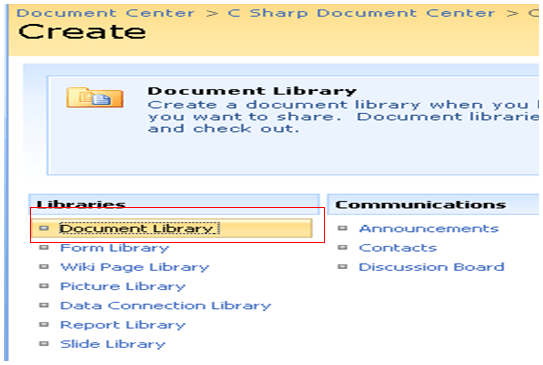
Step 2c:
From Libraries tab select Document Library.
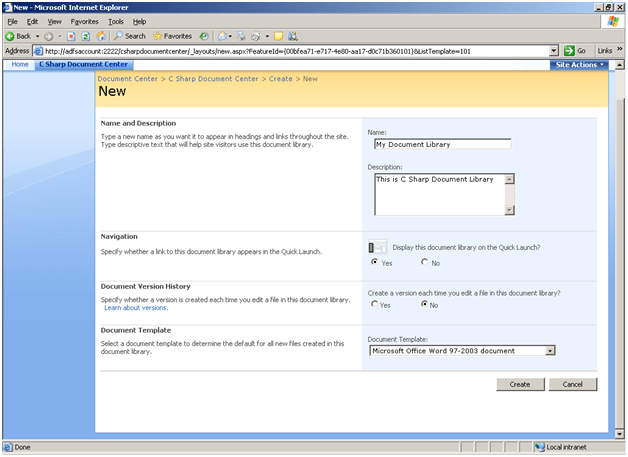
Step 2d:
Give a name and description. And leave the other default settings. The name I am giving here is My Document Library. Then Click on Create.
Step 2e:
Now in Document Tab you could able to see newly created Document library.

Step 3: Add Properties to the Document library
Click on My Document Library and then Setting. Then select Create Column.
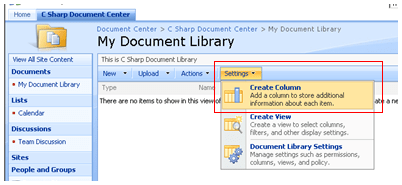
I am adding three columns here,
- Document Status
- Assignee
- Review Comments.
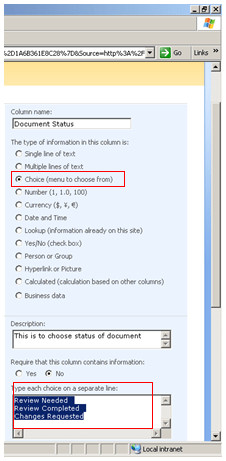
Document Status Column
- Give type as Choice Menu to choose from
- Give column name Document Status
- Give any description
-
Give Choice as
Review Needed
Review Completed
Changes Requested
-
Leave other fields as default and click on Ok to create the column.
Assignee column
Add this column exactly the way explained above. Only give type of information as Single Line of Text. Leave other fields with default values.
Review Comments column
Add this column exactly the way explained above. Only give type of information as Multiple Line of Text. Leave other fields with default values.
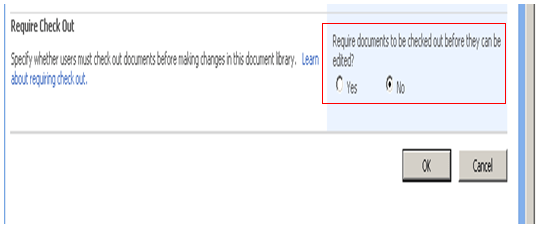
Step 4: Enable Document to be edited without Checkout
Go to My Document Library then Document Library Setting.
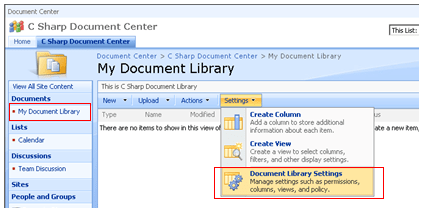
Then select Versioning setting from General Setting tab.
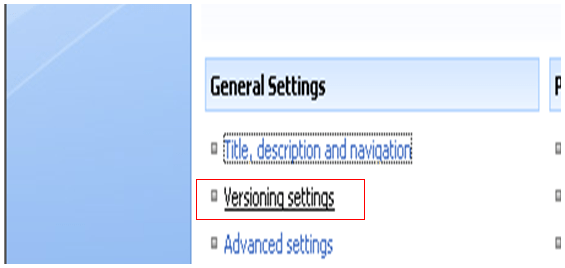
Then scroll down and select No option for Check out. And click Ok.
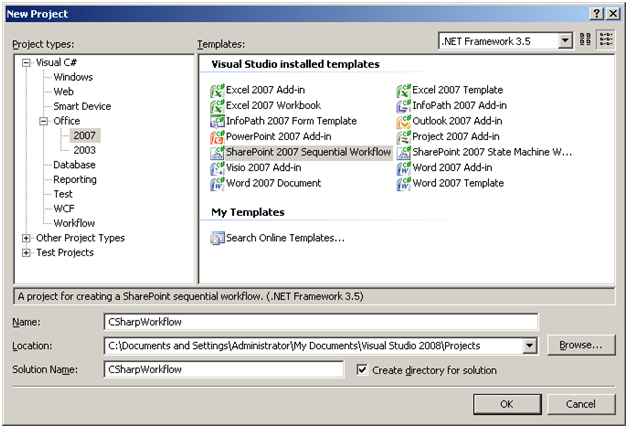
Step 5: Create a SharePoint Sequential Workflow project in Visual Studio 2008.
- Start Visual Studio
- Open new project
- Select office node
- Select 2007 node
- Select SharePoint 2007 workflow from template pane
-
Give any name. I am giving name here “CSharpWorkflow”.
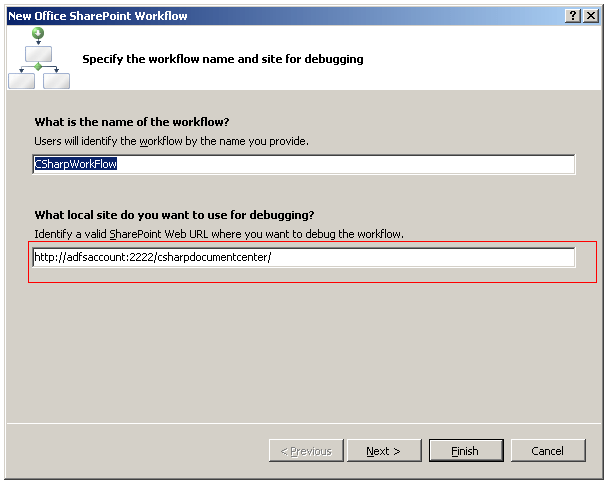
What local site you want to use for debugging?
Extra care is needed here. Give the URL of the Site you created in above steps.
For library select My Document Library. We created this library in step 2.
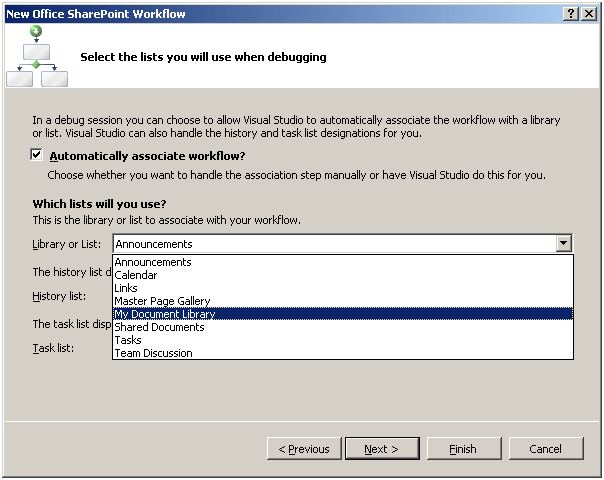
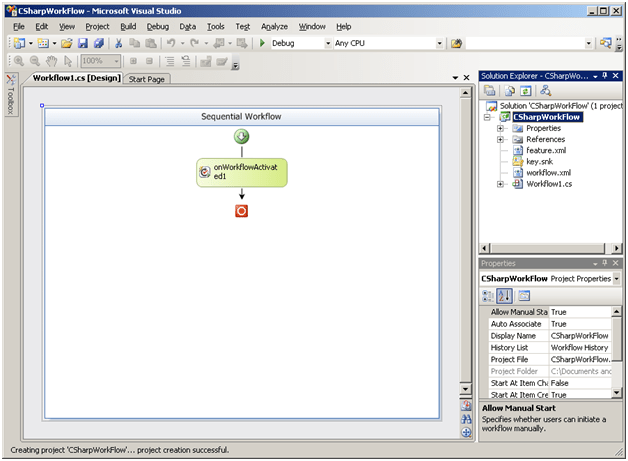
Leave the default setting and click on Finish to create the workflow.

A Sequential workflow like below will get created.
Step 5: Create a Workflow schedule
- From designer select onWorkflowActivated1 and right click then Properties.
- In Invoke property type onWorkflowActivated and press enter.
- Code window will get open with event handler for Invoke properties.
-
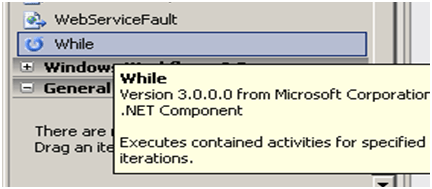
Again go to designer. Open toolbox and from Windows workflow version 3.0 tab select While activity.
-
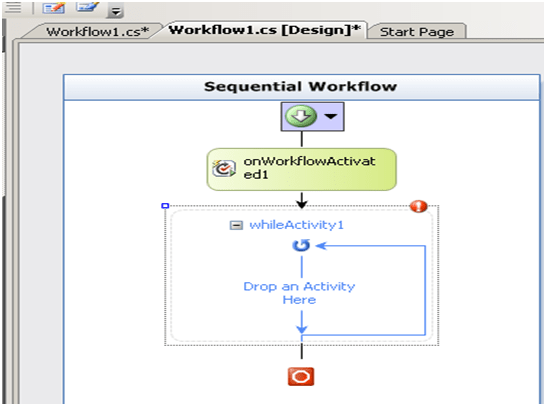
Drag and drop While Activity under onWorkflowActivities. After dragging and dropping designer will look like below.
- Go to Property of While Activity and in Condition property give Code Condition.
- Expand the Condition property and in child condition tab type isWorkflowPending. And press Enter. Code window will open and a method called isWorkflowPending will get added.
- Open the designer. Open Toolbox and select SharePoint Workflow tab. From this select
-
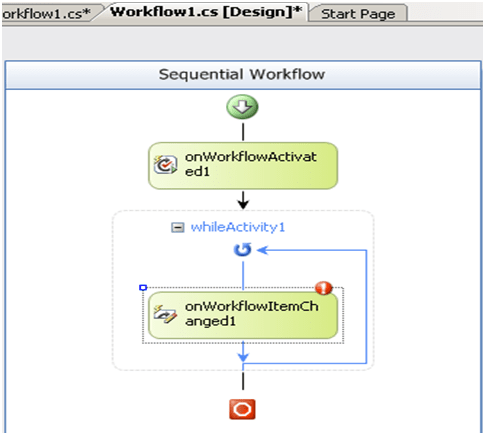
From this drag OnWorkflowItemChanged control inside while activity . After dragging designer will look like below.
-
Select onWorkflowItemChanged1 and go to properties. set the properties as below,
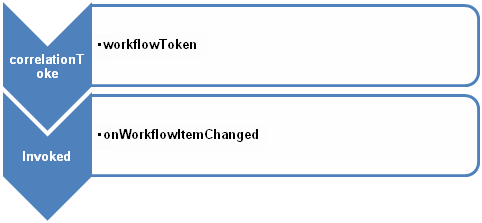
Note: Please type onWorkflowItemChanged in Invoked property.
Step6: Handle Activity Events
-
Define a Global variable
Boolean workflowPending = true;
-
Create a private method to check the status of the document.
private void CheckStatus()
{
if ((string)workflowProperties.Item[“Document Status”] == “Review Completed”)
workflowPending = false;
}
- Call CheckStatus method inside onWorkflowActivated and onWorkflowItemChanged events.
Workflow1.cs
using System;
using System.ComponentModel;
using System.ComponentModel.Design;
using System.Collections;
using System.Drawing;
using System.Linq;
using System.Workflow.ComponentModel.Compiler;
using System.Workflow.ComponentModel.Serialization;
using System.Workflow.ComponentModel;
using System.Workflow.ComponentModel.Design;
using System.Workflow.Runtime;
using System.Workflow.Activities;
using System.Workflow.Activities.Rules;
using Microsoft.SharePoint;
using Microsoft.SharePoint.Workflow;
using Microsoft.SharePoint.WorkflowActions;
using Microsoft.Office.Workflow.Utility;
namespace CSharpWorkFlow
{
public
sealed
partial
class
Workflow1 : SequentialWorkflowActivity
{
Boolean workflowPending = true;
public Workflow1()
{
InitializeComponent();
}
public
Guid workflowId = default(System.Guid);
public
SPWorkflowActivationProperties workflowProperties = new
SPWorkflowActivationProperties();
private
void onWorkflowActivated(object sender, ExternalDataEventArgs e)
{
CheckStatus();
}
private
void isWorkflowPending(object sender, ConditionalEventArgs e)
{
e.Result = workflowPending;
}
private
void onWorkflowItemChanged(object sender, ExternalDataEventArgs e)
{
CheckStatus();
}
private
void CheckStatus()
{
if ((string)workflowProperties.Item[“Document Status”] == “Review Completed”)
workflowPending = false;
}
}
}
Step7: Testing the Workflow
- Press F5 to run with debug.
- Site which URL you given in Step 5 will get open. In my case this is the site, I created in Step 1.
-
If you remember, I given the name to library as My Document Library . That library is open
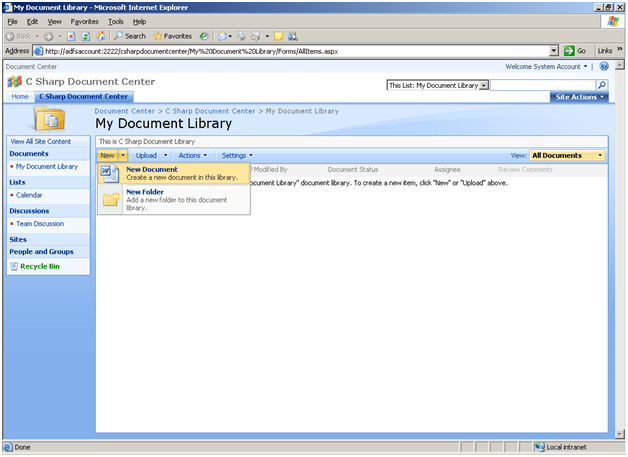
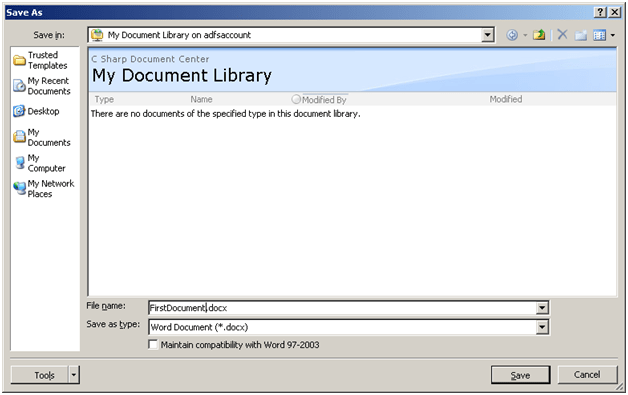
- Create a New Document inside this library. Just click on New and then New Document.
-
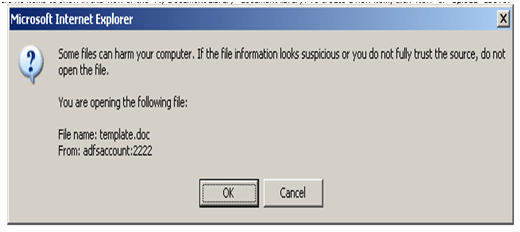
Press Ok to message displayed.
-
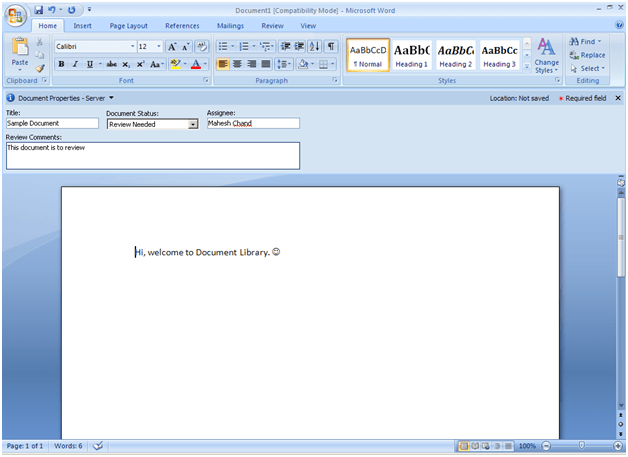
If you see, all the Properties I added are attached in the document as column. Document Status, Assignee, Review Comments are added in the document. Give some value and save the document at default location.
Note: Please in Document Status property select Review Needed.
-
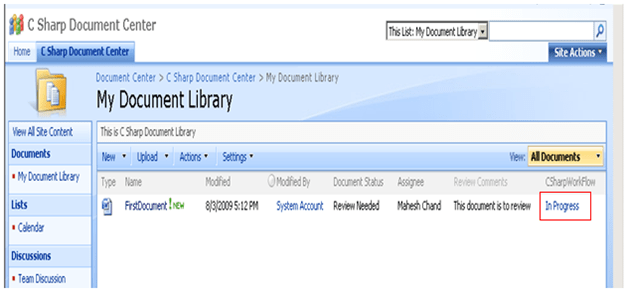
Close the document.
Now you would able to see the workflow status is In Progress
-
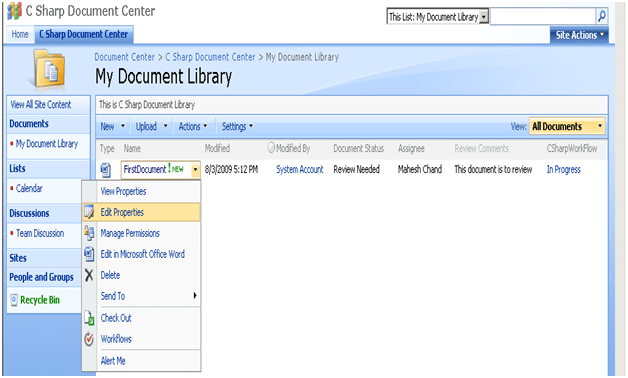
Click on drop down of the document and select Edit properties.
-
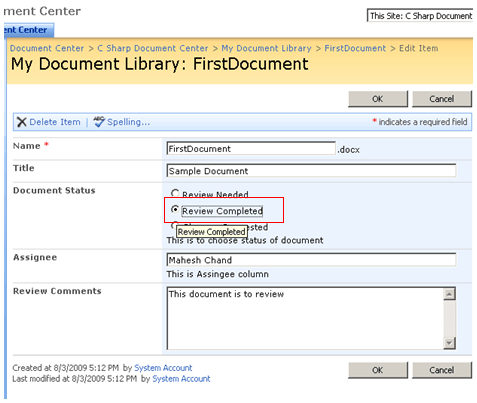
Now change Document Status to Review Completed and press Ok.
-
Refresh the Site
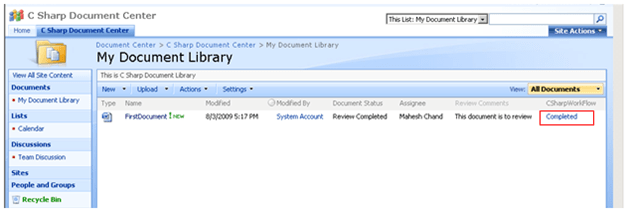
Since, user has changed the status to Review Completed so now workflow status is also completed.
Conclusion:
In this article, I discussed
- How to create a Sharepoint Site
- How to create Document Library inside that
- How to add custom properties in Document library
Last but not least,
- I discussed, how to add Sequential Workflow to document library using Visual studio 2008.
Thanks for reading
Happy coding
Discover more from Dhananjay Kumar
Subscribe to get the latest posts sent to your email.

Thank u. good article
Thank u Dhananjay Kumar,
good article.
Keep posting new articles.
awesome article. Good to start with the Sequential workFlows
Thanks, for writing on workflow . hope will continue.