To understand ViewEncapsulation in Angular, first we should understand about Shadow DOM. You can learn in detail about Shadow DOM here. Putting it in simple words, Shadow DOM brings Encapsulation in HTML Elements. Using the Shadow DOM , markup, styles, and behaviors are scoped to the element and do not clash with other nodes of the DOM. Shadow DOM is part of Web Components, which encapsulates styles and login of element.
Angular Components are made up of three things:
- Component class
- Template
- Style
Combination of these three makes an Angular component reusable across application. Theoretically, when you create a component, in some way you create a web component (Theoretically, Angular Components are not web components) to take advantage of Shadow DOM. You can also use Angular with browsers, which does not support Shadow DOM because Angular has its own emulation and it can emulate Shadow DOM.
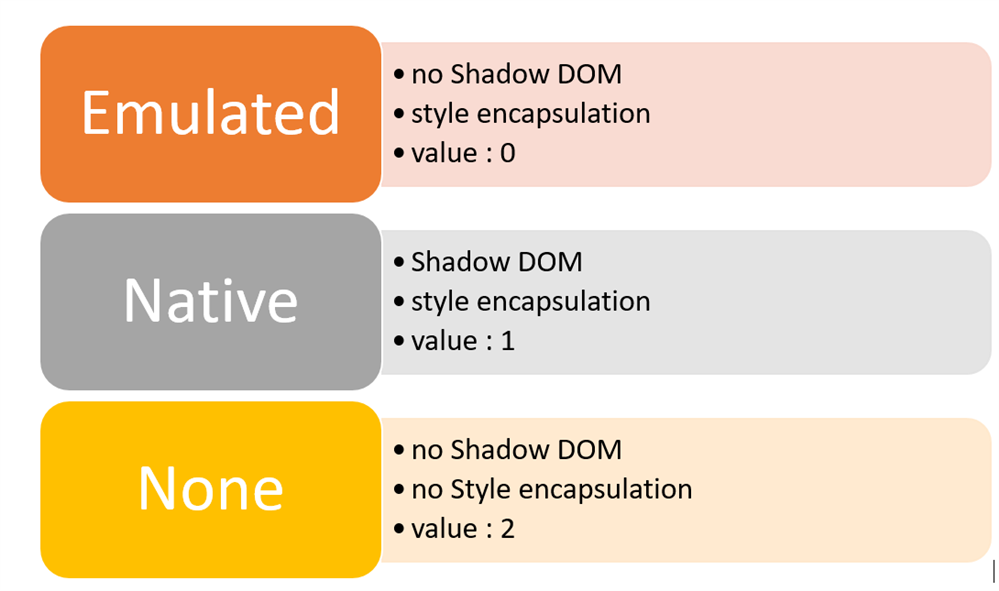
To emulate Shadow DOM and encapsulate styles, Angular provides there types of ViewEncapsulation. They are as follows:
Let us try to understand it using an example. I have created a component, as shown below:
app.component.ts
This file contains hidden or bidirectional Unicode text that may be interpreted or compiled differently than what appears below. To review, open the file in an editor that reveals hidden Unicode characters.
Learn more about bidirectional Unicode characters
| import { Component, ViewEncapsulation } from '@angular/core'; | |
| @Component({ | |
| selector: 'app-root', | |
| templateUrl: './app.component.html', | |
| styleUrls: ['./app.component.css'], | |
| encapsulation: ViewEncapsulation.None | |
| }) | |
| export class AppComponent { | |
| title = 'parent component'; | |
| } |
app.component.html
This file contains hidden or bidirectional Unicode text that may be interpreted or compiled differently than what appears below. To review, open the file in an editor that reveals hidden Unicode characters.
Learn more about bidirectional Unicode characters
| <div> | |
| <h1> | |
| Welcome to {{ title }}! | |
| </h1> | |
| </div> | |
| <app-child></app-child> |
app.component.css
This file contains hidden or bidirectional Unicode text that may be interpreted or compiled differently than what appears below. To review, open the file in an editor that reveals hidden Unicode characters.
Learn more about bidirectional Unicode characters
| h1 { | |
| background: red; | |
| color: white; | |
| text-transform: uppercase; | |
| text-align: center; | |
| } |
We are setting the style of h1 in the component CSS. We have also created another component:
This file contains hidden or bidirectional Unicode text that may be interpreted or compiled differently than what appears below. To review, open the file in an editor that reveals hidden Unicode characters.
Learn more about bidirectional Unicode characters
| import { Component } from '@angular/core'; | |
| @Component({ | |
| selector: 'app-child', | |
| template: ` | |
| <h1>{{title}}</h1> | |
| ` | |
| }) | |
| export class AppChildComponent { | |
| title = 'child app'; | |
| } |
In AppChildComponent, we are also using h1 tag. To understand different ViewEncapsulation options, we will change the metadata of AppComponent.
Let us start with ViewEncapsulation.None, in this option,
- There is no shadow DOM
- Style is not scoped to component
As you run the application, you will find h1 style has applied to both components, even though we set style only in AppComponent. It happened because in AppComponent we have set encapsulation property to ViewEncapsulation.None.
This file contains hidden or bidirectional Unicode text that may be interpreted or compiled differently than what appears below. To review, open the file in an editor that reveals hidden Unicode characters.
Learn more about bidirectional Unicode characters
| @Component({ | |
| selector: 'app-root', | |
| templateUrl: './app.component.html', | |
| styleUrls: ['./app.component.css'], | |
| encapsulation: ViewEncapsulation.None | |
| }) | |
| export class AppComponent { | |
| title = 'parent component'; | |
| } |
In the browser when you examine source code, you will find h1 style has been declared in the head section of the DOM.
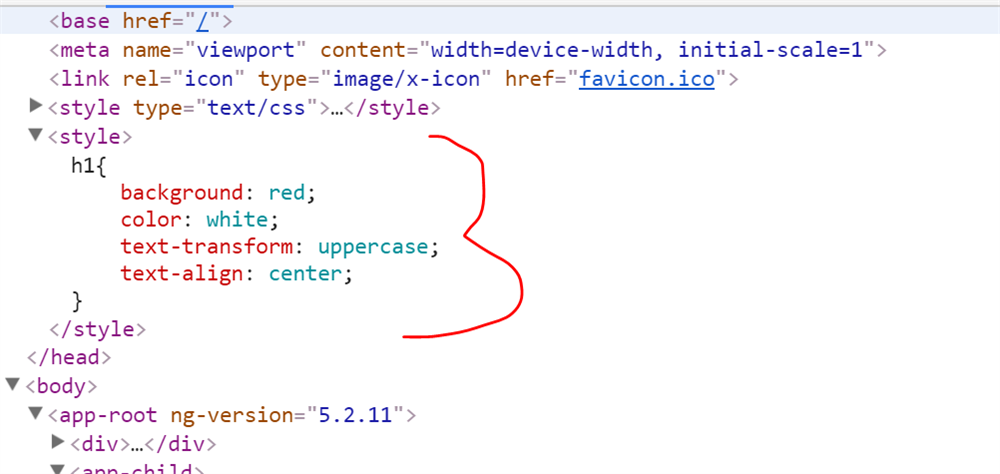
Therefore, in ViewEncapsulation.None, style gets move to the DOM head section and is not scoped to the component. There is no Shadow DOM for the component and component style can affect all nodes of the DOM.
Next, let us explore ViewEncapsulation.Native, in this option:
- Angular will create Shadow DOM for the component.
- Style is scoped to component
As you run the application, you will find h1 style has applied to both components, even though we set style only in AppComponent. It happened because in AppComponent we have set encapsulation property to ViewEncapsulation.Native, and we are using AppChildComponnet as child inside template of AppComponent.
Read full article on the Infragistics blog
Discover more from Dhananjay Kumar
Subscribe to get the latest posts sent to your email.

One thought on “Understanding ViewEncapsulation in Angular”