Objective
In this article I will show how to make a basic twitter client for Windows 7 mobile. This is part 1 of the series. In this part, I will show only how to read statues of given user. In further parts, I will show Tweet, Re tweet and Direct Message functionalities.
Follow the below steps
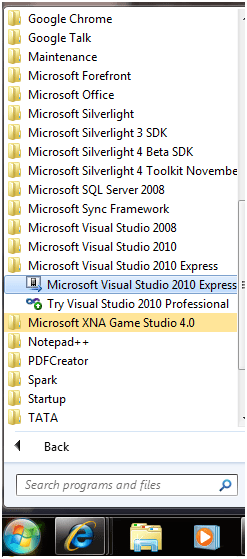
Step 1 From Start menu select Microsoft Visual Studio 2010 express edition
Step 2
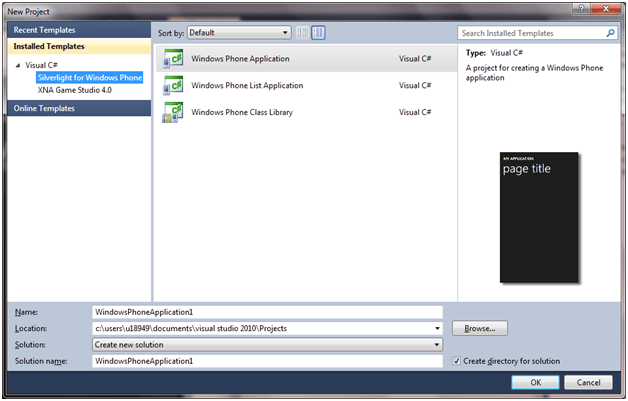
From File menu select New Project. From Silverlight for Windows phone tab select Windows Phone application project type.
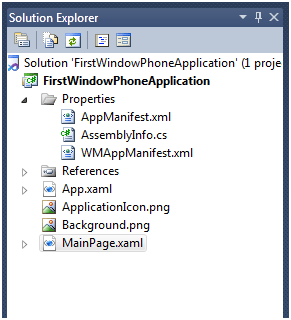
Once selecting that a new project will get created with below solution structure
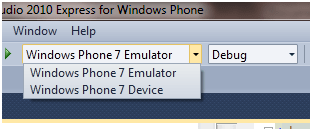
Make sure in Debug option Windows Phone7 Emulator is selected. If it is selected to Windows Phone 7 Device then Visual studio will deploy the application to mobile device directly.
Step 3
Design phone page
- Change text of title text box to “Twitter for Windows 7 Phone “
- Divide content grid in two rows.
- In first row put a stack panel with horizontal orientation.
- Inside stack panel put a textbox and button. User will input twitter username in textbox. Button click (Touch event in real device) will fetch status of entered user name.
- Style for both textbox and button is from the default static resources PhoneTextBoxStyle and PhoneButtonBase.
- In second row of content grid put another grid and divide this grid in two rows again.
- In first row put a list box with style PhoneListBox
- Inside Item template put a data template.
- Inside data template put a stack panel.
- Put three textboxes and one image control. These controls I will bind with the properties of the tweet entity class.
- In second row of grid put a text block and a display message.
MainPage.xaml
| <phoneNavigation:PhoneApplicationPage x:Class=”TwiiterClient.MainPage” xmlns=http://schemas.microsoft.com/winfx/2006/xaml/presentation xmlns:x=http://schemas.microsoft.com/winfx/2006/xaml xmlns:phoneNavigation=”clrnamespace:Microsoft.Phone.Controls;assembly=Microsoft.Phone.Controls.Navigation” xmlns:d=http://schemas.microsoft.com/expression/blend/2008 xmlns:mc=http://schemas.openxmlformats.org/markup-compatibility/2006 mc:Ignorable=”d” d:DesignWidth=”480″ d:DesignHeight=”800″ FontFamily=”{StaticResource PhoneFontFamilyNormal}” FontSize=”{StaticResource PhoneFontSizeNormal}” Foreground=”{StaticResource PhoneForegroundBrush}”> <Grid x:Name=”LayoutRoot” Background=”Green”> <Grid.RowDefinitions> <RowDefinition Height=”Auto”/> <RowDefinition Height=”*”/> </Grid.RowDefinitions> <Grid x:Name=”TitleGrid” Grid.Row=”0″> <TextBlock Text=”Twitter for Windows 7 Phone” x:Name=”Twitter” Style=”{StaticResourcePhoneTextPageTitle1Style}”/> <TextBlock Text=”Twitter” x:Name=”Windows7Twitter” Style=”{StaticResource PhoneTextPageTitle2Style}”/> </Grid> <!–ContentGrid is empty. Place new content here–> <Grid x:Name=”ContentGrid” Grid.Row=”1″> <Grid.RowDefinitions> <RowDefinition Height=”Auto” /> <RowDefinition Height=”*” /> </Grid.RowDefinitions> <StackPanel Grid.Row=”0″ Orientation=”Horizontal” HorizontalAlignment=”Stretch” VerticalAlignment=”Stretch” Margin=”0,0,0,0″> <TextBox x:Name=”txttweet” Height=”10″ Width=”325″ HorizontalAlignment=”Stretch” VerticalAlignment=”Stretch” Opacity=”10″ Style=”{StaticResource PhoneTextBoxStyle}” /> <Buttonx:Name=”btnTwiiter” Content=”Tweets” Height=”60″ Width=”150″ Style=”{StaticResource PhoneButtonBase}”/> </StackPanel> <Grid Grid.Row=”1″> <Grid.RowDefinitions> <RowDefinition Height=”*”/> <RowDefinition Height=”Auto” /> </Grid.RowDefinitions> <ListBox Grid.Row=”0″ Height=”Auto” Margin=”10,0,0,0″ Name=”listBox1″ Width=”476″ Style=”{StaticResource PhoneListBox}”> <ListBox.ItemTemplate> <DataTemplate> <StackPanel Orientation=”Horizontal” Height=”132″> <Image Source=”{Binding ImageSource}” Height=”73″ Width=”73″ VerticalAlignment=”Top” Margin=”0,10,8,0″/> <StackPanel Width=”370″> <TextBlock Text=”{Binding UserName}” Foreground=”#FFC8AB14″ FontSize=”28″ /> <TextBlock Text=”{Binding Message}” TextWrapping=”Wrap” FontSize=”24″ /> <TextBlock Text=”{Binding CreatedAt}” FontSize=”20″ Foreground=”#FFC8AB14″ /> </StackPanel> </StackPanel> </DataTemplate> </ListBox.ItemTemplate> </ListBox> <TextBlock Text=”Developed by Dhananjay Kumar at MIT UST Global” Style=”{StaticResource PhoneTextAccentStyle}” Grid.Row=”1″/> </Grid> </Grid> </Grid> </phoneNavigation:PhoneApplicationPage> |
Step 4
Creating an twitter entity class
Right click and add a class in project. I have given name here twitter to the class. I am going to work on only 4 data exposed by twitter API. So entity class is as below
Twitter.cs
1 using System;
2 using System.Net;
3 using System.Windows;
4 using System.Windows.Controls;
5 using System.Windows.Documents;
6 using System.Windows.Ink;
7 using System.Windows.Input;
8 using System.Windows.Media;
9 using System.Windows.Media.Animation;
10 using System.Windows.Shapes;
11
12 namespace TwiiterClient
13 {
14 public class Twitter
15 {
16 public string UserName { get; set; }
17 public string Message { get; set; }
18 public string ImageSource { get; set; }
19 public string CreatedAt { get; set; }
20
21 }
22 }
In this step, I will be using Twitter API. And will apply LINQ to XML to fetch the desired data. Twitter API will be returning an XML.
MainPage.Xaml.CS
1 using System;
2 using System.Collections.Generic;
3 using System.Linq;
4 using System.Net;
5 using System.Windows;
6 using System.Windows.Controls;
7 using System.Windows.Documents;
8 using System.Windows.Input;
9 using System.Windows.Media;
10 using System.Windows.Media.Animation;
11 using System.Windows.Shapes;
12 using Microsoft.Phone.Controls;
13 using System.Xml.Linq;
14
15 namespace TwiiterClient
16 {
17 public partial class MainPage : PhoneApplicationPage
18 {
19 public MainPage()
20 {
21 InitializeComponent();
22
23 SupportedOrientations = SupportedPageOrientation.Portrait | SupportedPageOrientation.Landscape;
24 btnTwiiter.Click += new RoutedEventHandler(btnTwiiter_Click);
25
26 }
27
28 void btnTwiiter_Click(object sender, RoutedEventArgs e)
29 {
30 WebClient client = new WebClient();
31 client.DownloadStringCompleted += new DownloadStringCompletedEventHandler(client_DownloadStringCompleted);
32 client.DownloadStringAsync(new Uri(“http://api.twitter.com/1/statuses/user_timeline.xml?screen_name=” + txttweet.Text));
33 }
34
35 void client_DownloadStringCompleted(object sender, DownloadStringCompletedEventArgs e)
36 {
37
38 if (e.Error != null)
39 return;
40 XElement xmlTweets = XElement.Parse(e.Result);
41 listBox1.ItemsSource = from tweet in xmlTweets.Descendants(“status”)
42 select new Twitter
43 {
44 ImageSource = tweet.Element(“user”).Element(“profile_image_url”).Value,
45 Message = tweet.Element(“text”).Value,
46 UserName = tweet.Element(“user”).Element(“screen_name”).Value,
47 CreatedAt = tweet.Element(“created_at”).Value
48 };
49 Windows7Twitter.Text = txttweet.Text;
50
51
52 }
53 }
54 }
Explanation
- Add reference of System.XML.Linq.
- Using Web Client class call the Twitter REST service.
- Parsing the result using XElement.
- Using LINQ creating the twitter entity class and setting it as item source of list box.
-
If service call is returning error then just returning .
Just press F5 and in Windows 7 mobile emulator you can see the output. Enter user name in the text to fetch tweets.
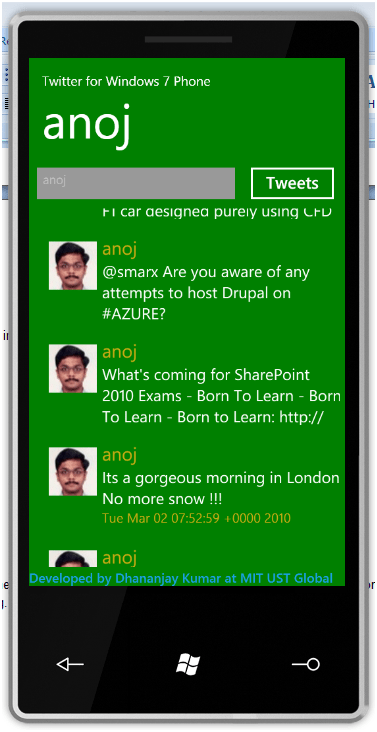
Conclusion
This article explained how to create a basic twitter client for Window7 mobile. In further articles, I will show how to achieve other functionalities of twitter. Thanks for reading. Hope it was useful.
Discover more from Dhananjay Kumar
Subscribe to get the latest posts sent to your email.

Awaiting for the part2 of the tutorial to see how to tweet & retweet. please do add soon .
Create a series of simple apps like this. It will be very helpful for beginners .