When service and client both are of .Net and resides on different machines then we choose preconfigured netTcpBinding to publsih WCF Service to the client.
netTcpBinding is best suited when both client and service are of .Net and communicating to each other either over Intranet or Internet.
Since both the service and client are in .Net, so performance of this binding is very much optimized for best. There is no overload of interoperability.
netTcpBinding uses TCP Protocol and Binary Encoding . Few deafult properties of netTcpBinding is listed in below digram.
Now let us create a WCF service using netTcpBinding . what we are going to do
1. Create a WCF Service
2. Host Service in Console Application
3. Configure EndPoint with netTcpBinding
4. Consume service at console client.
Create WCF Service
Open Visual Studio 2010 and create a new project by selecting WCF Service Aplication project template in WCF tab. If you are using Visual Studio 2008 then select WCF Service Application from Web Tab.
Now let us create a very simple Service Contract
IService1.cs
using System.ServiceModel;
namespace WcfService10
{
 [ServiceContract]
 public interface IService1
 {
 [OperationContract]
 string GetDataUsingnetTcpBinding(int value);

 }
}
Implement service as below,
Service1.svc.cs
namespace WcfService10
{

 public class Service1 : IService1
 {
 public string GetDataUsingnetTcpBinding(int value)
 {
 return string.Format("You are fetching: {0} using netTcpbinding", value);
 }
 }
}
Host Service in Console Application
To host WCF Service we are going to create console application. Just create a console application. Add below references in console application project,
Add the project reference of WCF Service application project we created in previous step. Right click on console application project and select Add Reference then click on Project tab and browse to WCF Service application project we created in previous step.
After adding all required references and of WCF Service project, we are going to write a code to host the application.
Program.cs
using System;
using System.ServiceModel;

namespace HostApplication
{
 class Program
 {
 static void Main(string[] args)
 {
 ServiceHost host = new ServiceHost(typeof(WcfService10.Service1));
 host.Open();
 Console.WriteLine("Press a key to close the host");
 Console.ReadKey(true);
 host.Close();

}
 }
}
In above code, we are creating instance of ServiceHost, opening the host and closing that.
Configure EndPoint with netTcpBinding
Now we need to configure EndPoint with netTcpBinding. Right click and add new item then choose Application Configuration file from General tab.
App.Config
<?xml version="1.0" encoding="utf-8" ?>
<configuration>
 <system.serviceModel>
 <services>
 <service name="WcfService10.Service1" behaviorConfiguration ="netTcpServiceBehavior">
 <endpoint address =""
 binding ="netTcpBinding"
 contract ="WcfService10.IService1" />
 <endpoint address="mex"
 binding="mexTcpBinding"
 contract="IMetadataExchange"/>
 <host>
 <baseAddresses >
 <add baseAddress ="net.tcp://localhost/SampleNetTCPService"/>
 </baseAddresses>
 </host>
 </service>
 </services>
 <behaviors>
 <serviceBehaviors>
 <behavior name="netTcpServiceBehavior">
 <serviceMetadata httpGetEnabled="false" httpGetUrl=""/>
 <serviceDebug includeExceptionDetailInFaults="false"/>
 </behavior>
 </serviceBehaviors >
 </behaviors >
 </system.serviceModel>
</configuration>
In above configuration file
1. We are creating service behavior. In service behavior service, we are configuring metadata will not get enabled through over Http.
2. Attaching the service behavior with service
3. Creating base address. Client will able to consume the service on address net.tcp://localhost/sampleNetTCPService
4. Creating the EndPoints. First EndPoint is for service contract IService1 and other endpoint is for metadata.
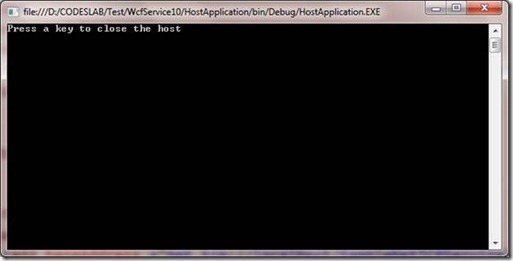
Run the console application
Now service is up and running.
Consume service at console client
Since our service is up and running this is time to consume the service. Create a console application project right click and add service reference. In address you need to provide the same address we configured in App.Config file of host console application project.
Note: You need to make sure host console application project is running else you will get error while adding service reference.
After successfully adding the service reference we can call the service in normal way
Program.cs
using System;
namespace ConsoleApplication10
{
 class Program
 {
 static void Main(string[] args)
 {
 ServiceReference1.Service1Client proxy = new ServiceReference1.Service1Client();
 string result = proxy.GetDataUsingnetTcpBinding(99999);
 Console.WriteLine(result);
 Console.ReadKey(true);

}

 }
}
On running we will get the output as below ,
In this article we saw how we could use netTcpBinding for communication between two .Net Application residing on different machines.


Leave a comment